My Mercury Cougar XR7 Convertible 1970,351C-4V w Hurst-Toploader.
Restoration tips and tricks, DIY, How To:s, technical information about Ford and Mercury.
Mercury Cougar XR7 Convertible 1970.
Mercury Cougar XR7 Convertible 1970
DIY How to: 1969 1970 electric headlight door actuator conversion.
This instruction i share for free and i hope you find it helpful.
Do your headlight doors open when car is sitting still? Probably something in your vacuum system is leaking.
Or do you running a large cam and have problem keeping the headlight doors closed or they are flapping? This is the solution.
This conversion is fairly cheap, cost would not be more than maximum $100 in total (2013).
It will be much cheaper than restore your old vacuum assembly and will last for ever. Best of all you can reinstall the vacuum parts later and this conversion will not do any damages to your car because the use of all bolt holes is already there and original, no aditional drilling in the car is necessary.
This instruction will save you more than 400 bucks compared to the kits available out there.
It requires basic tools, basic engineering, basic wiring skills, You can do it.
What u need is a Mazda Miata or a Ford Probe electric headlight motor/actuator.
Actuators you will find in your local car scrap yard for a low cost.
If possible get the lever arm to.
Dont bother to buy a refurbished, its waste of money IMO.
The actuators is left or right, doesnt matter which you get.
The difference will be to which side of the radiator support your actuator can be installed.
You need:
A piece of metal sheet aprox. 4" by 6" with thickness the same as radiator support.
Some wiring, a fuse 20 amp and a fuse holder.
A relay.
A adjustable rod of some sort (turnbuckle), i used one with a fork style end and installed a heim joint in the other end.
The benefit with the forkstyle is that you get a completly straight lever arm and not the leaning/angled you get when bying available kits on the market.
I used stainless rod and bolts but you can use anything you like.
The motor/actuator have 3 fasteners (5/16) you have to position and drill in your bracket, also you have to drill a larger hole för the axle to come through the bracket.
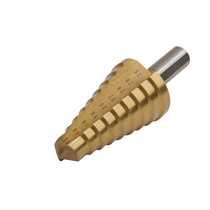
I used a step drill for the larger hole.
step drill
You have to fabricate a lever arm.
Here you can se the bracket hiding the motor. The heim joint is bolted to the fabricated lever arm.
The fork style upper adjustable fastener, this is the equlizer bar arm in closed position.
Measure from this position to open position and half that length when fabricating the lever for the actuator.
With the adjustable rod you can adjust the open to close fitment.
If the equalizer bar bends when operating the adjustable rod is to long or to short.
Close pic of the lever at the actuator, notice the bent shape.
The trick is that you have to fabricate the lever arm to the actuator with a center to center length half of the length of the equalizer arm travel.
Deassemble the vacuum actuator arm, remove it and try to measure the difference between open and closed headlight door arm (center to center bolt hole) by turning the doors manually open to closed.
Detach the headlight door springs and it will be easier to work.
Also you might be forced to relocate the springs later because they are pretty heavy and can cause the fuse to break..
The bracket you have to fold/bend 90 degrees approx. 2" so the surface for mounting the actuator will be 4"x4".
The 2" will be facing up and bolted to the former vacuum actuator bolt hole.
Positioning the actuator can be in several ways. Straight backwards or in an angle of 45 degres, i did mount my actuator straight down and in that position the actuator is nearly unvisible.
When the actuator is installed noone will ever notice its there.
The actuator with bracket and lever arm.
The actuator other side.
The electric scheme is here:
DO ALWAYS DISCONNECT THE BATTERY WHEN WORKING WITH THE ELECTRICAL SYSTEM!
The actuator works like this when properly installed. When you turn your headlight on a signal to the relay makes the actuator turn a half revolution and stop, open. When you switch the lights off the relay gives a signal to actuator to turn another half turn and stop, closed. The actuator also have a manual knob you can turn to open/close if its get broken, but it will not.
I found it easier to losen the adjustable rod instead, if it will break down though.
The relay i tucked away behind the radiator support (behind washer bottle) not visible and i used a already existing bolt hole, no drilling.
The electric connection at the headlight switch on the floor.
I used black shrimping tubes for my wiring to make a more clean installation.
Optional: You can install a rheostat to the electric feed if you want to control open/close speed.
Note: With this setup you cant open/close the doors individually. That requires 2 actuators a dual controll box and you have to cut the equalizer bar.
Here you can see the copper tube and rubber grommet.
Optional: Often the equalizer bar for the headlight doors flex because of that the original plastic bushings is cracked and missing. I solved the problem by using 2 copper tubing pieces approx. ½ inch long as a sleeve and 2 rubber grommets to fix the equalizer bar more firmly in place making the headlight doors closing more evenly.
When you are done and satisfied with the installation remove vacuum hoses and vacuum reservoir in the left fender, plug all remaining vacuum connections. Now you have a more reliable headlight door system. The car is lighter, more vacuum for your brake booster, your engine bay is cleaner and maybee better throttle response due to more vacuum. The best of all, if you regret this installation or whish to restore to original in the future its possible and nothing is really destroyed.
To the Swedish readers: Rostfri vantskruv finns på båtavdelningen hos Biltema.
Motorn går att hitta via Bildelsbasen.se.
If you have any questions about this conversion dont hesitate to contact me use the message box below.
Hi, very good "how to" Just a question, how long is your adjustable rod, between the 2 "eyes" (or joints) in millimeters? thank s a lot, i'll do it soon ;) greetings from France (69 XR7)


Great info!
SvaraRaderaThnx man, you saved me some money. I'll send you a couple of bucks for your work.
SvaraRaderaDid this conversion last year from the description, working great.
SvaraRaderaI'm working on converting my 70 convertible, but could use some help on the type of relay?? p/n or type would be helpful. thx
SvaraRaderaHello. Its a standard 12 volt relay. Search for one with the same numbers as in my drawing above.
RaderaHi, very good "how to"
SvaraRaderaJust a question, how long is your adjustable rod, between the 2 "eyes" (or joints) in millimeters?
thank s a lot, i'll do it soon ;)
greetings from France (69 XR7)
Hello. Late answer, its about 175-180 mm. Thanks for asking.
Radera